
How to Prepare IT Equipment for End-of-Life Collection
Retiring business IT equipment requires more than disconnecting devices and placing them into storage. Laptops, desktops, mobile phones, tablets and other equipment may remain linked to user accounts, cloud-management platforms, activation locks and internal asset registers. Correct preparation helps protect company data, prevents processing delays and maximises the potential value of reusable equipment.
Why Proper Preparation Matters
Preparing IT equipment correctly before collection helps ensure that devices can be processed securely, efficiently and in accordance with your organisation’s disposal requirements.
Modern laptops, desktops, mobile phones and tablets may remain connected to user accounts, cloud services, encryption systems or mobile device management platforms long after they have stopped being used. If these connections are not removed, equipment may remain locked or automatically re-enrol into the organisation’s management system after being reset.


Completing the appropriate end-of-life procedures can help to:
-
Protect company and user information.
-
Confirm that important business data has been backed up.
-
Prevent devices from remaining linked to former users.
-
Remove activation locks and management-system enrolment.
-
Reduce delays during collection and processing.
-
Maximise the potential reuse and rebate value of equipment.
-
Ensure that company asset records remain accurate.
-
Support refurbishment and reuse before material recycling.
-
Avoid additional administration associated with locked devices.
Equipment that cannot be unlocked or released from a management platform may still be securely data destroyed or recycled. However, its potential for refurbishment and reuse can be significantly reduced.
Important: Removing a device from an employee’s possession does not necessarily remove it from Microsoft Intune, Windows Autopilot, Apple Business Manager, iCloud, Google accounts or other management systems.
Step 1: Identify and Record the Equipment
Where possible, record:
-
Device type
-
Manufacturer and model
-
Serial number
-
Asset tag
-
Assigned user
-
Department or location
-
General condition
-
Whether a charger, dock or other accessory is included
-
Whether the device contains data-bearing storage
-
Whether the equipment has been authorised for disposal
This information helps ensure that equipment can be matched against your internal asset register and reduces the risk of devices being omitted, duplicated or released without approval.
For larger collections, providing an equipment list before collection can also help with planning, asset tracking and reporting.
Good practice: Where serial numbers are difficult to access, record the organisation’s asset tag and assigned user before the device is disconnected.


Step 2: Confirm Disposal Authorisation
Equipment should only be released once the appropriate person or department has formally approved it for disposal.
Depending on the organisation, approval may be required from:
-
The IT department
-
Information security
-
Finance
-
Facilities management
-
The assigned user’s manager
-
Data protection or compliance personnel
-
The organisation’s asset-management team
Before collection, confirm that:
-
The equipment is no longer required.
-
The device is not awaiting reassignment.
-
Any leasing or finance agreement has ended.
-
The asset is owned by the organisation.
-
Disposal has been recorded internally.
-
No legal hold, investigation or retention requirement applies.
This is particularly important for leased devices, equipment associated with departing employees and assets held as part of an insurance or legal claim.
Step 3: Back Up Required Business Data
Before a device is wiped, reset or released, ensure that all information the organisation needs to retain has been transferred or backed up.
This may include:
-
User documents
-
Email archives
-
Desktop and downloads folders
-
Locally stored databases
-
Browser bookmarks
-
Application settings
-
Encryption recovery keys
-
Software licence information
-
Photographs, recordings or project files
-
Data stored on removable media
-
Information required for regulatory or legal retention
Do not assume that all information is already stored in the cloud. Users may have saved files locally without synchronising them to the organisation’s network, Microsoft 365, Google Workspace or another cloud platform.
Once secure data destruction begins, information may not be recoverable.
Important: Bioteknik cannot determine which business files an organisation needs to retain. Backup and retention checks should therefore be completed before the equipment is released.


Step 4: Remove the Device from Its Assigned User
Before disposal, confirm that the equipment is no longer assigned to an employee, contractor or department.
Update your asset-management records to show that the device has been:
-
Returned by the user
-
Removed from active service
-
Approved for disposal
-
Transferred to a holding or disposal location
-
Removed from any active support or replacement schedule
Where an employee is leaving the organisation, the device return process should form part of the organisation’s offboarding procedure.
This should include checking that:
-
The correct device has been returned.
-
Chargers, docks and accessories have been included.
-
Any access cards, security tokens or SIM cards have been removed.
-
Business data has been transferred.
-
User access has been revoked where appropriate.
-
The asset register has been updated.
A clear employee return process reduces the risk of missing equipment and helps prevent devices from remaining linked to former users.
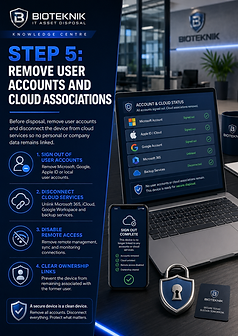
Step 5: Remove User Accounts and Cloud Associations
Removing a visible user profile from a device does not always remove the device from the organisation’s cloud systems.
Before collection, check whether the equipment remains associated with:
-
A Microsoft account
-
Microsoft Entra ID
-
Microsoft 365
-
An Apple ID or iCloud account
-
Google Workspace
-
A personal Google account
-
Manufacturer support or ownership portals
-
Remote-access platforms
-
Endpoint security software
-
Backup or monitoring services
Where possible:
-
Sign users out.
-
Remove personal and company accounts.
-
Revoke active sessions.
-
Remove the device from account portals.
-
Disable remote-access tools.
-
Remove ownership or activation associations.
This helps prevent the device from requesting former account credentials after it has been reset.

Step 6: Remove Mobile Device Management and Automated Enrolment
Devices managed through an MDM or enterprise deployment platform should be fully removed before collection.
Common platforms include:
-
Microsoft Intune
-
Windows Autopilot
-
Microsoft Entra ID
-
Apple Business Manager
-
Apple School Manager
-
Jamf
-
Samsung Knox
-
VMware Workspace ONE
-
Ivanti MobileIron
-
Cisco Meraki Systems Manager
-
Google Admin
-
Other enterprise-management platforms
Where applicable, the device should be:
-
Retired or unenrolled from the MDM platform.
-
Removed from automated deployment profiles.
-
Deleted from the organisation’s device inventory.
-
Released from Apple Business Manager or Apple School Manager.
-
Removed from Windows Autopilot.
-
Removed from Samsung Knox enrolment.
-
Disassociated from the assigned user.
-
Prevented from automatically re-enrolling after reset.
Simply factory-resetting a device may not remove its management status. A device can appear clear initially and then automatically reconnect to the organisation’s management platform during setup.
Important: MDM removal and data erasure are separate processes. Securely erasing a device does not necessarily remove its enterprise-management enrolment.
For detailed platform guidance, read our Mobile Device Management Removal and Device Offboarding Guide.
Step 7: Remove Activation Locks and Account Protection
Activation locks are designed to prevent unauthorised reuse of lost or stolen devices. However, they can also prevent legitimate refurbishment when equipment reaches end of life.
Before collection, check for:
-
Apple Activation Lock
-
Find My iPhone
-
Find My iPad
-
Find My Mac
-
Google Factory Reset Protection
-
Samsung account protection
-
Manufacturer ownership locks
-
Previous user account credentials
For Apple devices, the device should be removed from the user’s Apple ID and from any associated Find My service.
For Android devices, the associated Google account should be removed before the device is factory reset. This helps prevent Factory Reset Protection from requesting the previous account credentials during setup.
Where possible, verify that the device can be reset and restarted without requesting credentials belonging to the previous user.
Important: A factory reset does not always remove an activation lock. The device must normally be released from the associated account or management platform first.


Step 8: Remove BIOS, Firmware and Device Passwords
BIOS, UEFI and firmware passwords can prevent access to important device functions, including boot settings, storage configuration and secure erasure tools.
Before collection, remove where possible:
-
BIOS passwords
-
UEFI administrator passwords
-
Firmware passwords
-
Hard-drive passwords
-
System-management passwords
-
Startup or boot passwords
-
Mac firmware locks
If a password cannot be removed, record it securely and provide it through an agreed method where appropriate.
Do not attach passwords directly to equipment where they could be seen by unauthorised persons.
Removing these restrictions helps prevent delays and allows the device to be assessed, tested and securely processed.
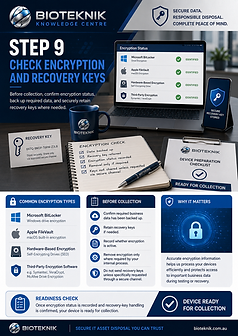
Step 9: Check Encryption and Recovery Keys
Many business devices use encryption such as:
-
Microsoft BitLocker
-
Apple FileVault
-
Hardware-based drive encryption
-
Third-party encryption software
Encryption is beneficial while equipment remains in use, but it can complicate data recovery or equipment testing after the device has been retired.
Before collection:
-
Confirm that required business data has been backed up.
-
Retain recovery keys if the organisation may need access before disposal.
-
Record whether BitLocker, FileVault or another encryption system is active.
-
Remove encryption only where required by your internal process.
-
Do not send recovery keys unless they are specifically requested through a secure channel.
Encryption does not prevent secure data destruction. However, having accurate information about the device’s encryption status can assist with efficient processing.

Step 10: Remove SIM Cards, Memory Cards and Removable Media
Before mobile phones, tablets, laptops and other devices are released, check them for removable media.
Remove:
-
SIM cards
-
eSIM profiles where required
-
SD and microSD cards
-
USB memory devices
-
External hard drives
-
Optical discs
-
Smart cards
-
Security tokens
-
Authentication keys
These items may contain company or personal information and may not form part of the intended disposal.
Organisations should either retain them, process them separately or clearly identify them for secure destruction
Step 11: Collect Chargers, Docks and Accessories
Including the correct accessories can improve the reuse and resale potential of equipment.
Where available, include:
-
Laptop chargers
-
Tablet and mobile-phone chargers
-
USB-C power adapters
-
Docking stations
-
Power leads
-
Keyboards and mice
-
Styluses
-
Cases
-
Device-specific adapters
-
Removable batteries
Accessories should be grouped with the relevant equipment where practical.
Avoid wrapping power leads tightly around devices, as this can damage cables, screens and ports during transport.


Step 12: Separate Equipment by Type or Condition
For larger collections, separating equipment can make loading, auditing and processing more efficient.
Useful categories include:
-
Laptops
-
Desktop computers
-
Mobile phones and tablets
-
Servers
-
Network equipment
-
Monitors
-
Printers
-
Data-bearing devices
-
Equipment intended for reuse
-
Damaged equipment
-
Batteries and hazardous items
Clearly identify any equipment that:
-
Contains sensitive data
-
Requires witnessed destruction
-
Is damaged or unsafe
-
Has a swollen battery
-
Is still locked to an account
-
Requires separate reporting
Do not power on or charge equipment with swollen, leaking or visibly damaged batteries. Keep it isolated and inform the collection provider before collection.
Step 13: Complete a Final Asset Verification
Before collection, carry out a final check against your asset register and disposal list.
Confirm that:
-
Every device due for disposal is present.
-
Serial numbers and asset tags match your records.
-
Equipment has been formally approved for disposal.
-
Assigned users have been removed.
-
Required data has been backed up.
-
Devices have been removed from management platforms.
-
Activation locks and account associations have been cleared.
-
Chargers and accessories have been included where available.
-
SIM cards, memory cards and removable media have been removed.
-
Any locked, damaged or sensitive equipment has been clearly identified.
-
The collection quantity matches the information supplied to the recycling provider.
For larger projects, nominate one person to oversee the final handover and retain a copy of the equipment list.


Step 14: Store Equipment Securely Before Collection
Once devices have been taken out of service, they should remain protected until collection takes place.
Where possible:
-
Store equipment in a controlled-access area.
-
Keep data-bearing devices separate from general waste.
-
Avoid leaving equipment in public corridors or unsecured loading areas.
-
Do not place devices in skips or mixed recycling containers.
-
Protect laptops, tablets and monitors from impact damage.
-
Keep equipment dry and away from excessive heat.
-
Isolate devices with damaged or swollen batteries.
-
Prevent unauthorised removal after the asset register has been completed.
Maintaining control of the equipment until handover supports a clear chain of custody and reduces the risk of loss or unauthorised access.
Step 15: Provide Collection and Site Information
Accurate information helps the collection run safely and efficiently.
Before the collection date, provide details such as:
-
Site address
-
Collection contact
-
Telephone number
-
Preferred collection date or access window
-
Approximate quantities
-
Equipment types
-
Number of floors
-
Lift availability
-
Loading or parking restrictions
-
Security or reception procedures
-
Any required vehicle permits
-
Whether equipment is boxed, palletised or loose
-
Whether stairs, long carrying distances or restricted access are involved
-
Any equipment requiring special handling
Inform the collection provider in advance about unusually heavy equipment, server racks, UPS systems, printers, damaged batteries or items located in difficult-to-access areas.


Locked Devices and Additional Administration
Examples include:
-
Apple iCloud Activation Lock
-
Find My iPhone, iPad or Mac
-
Google Factory Reset Protection
-
Microsoft Intune
-
Windows Autopilot
-
Apple Business Manager
-
Apple School Manager
-
Samsung Knox
-
Jamf
-
VMware Workspace ONE
-
Other MDM or enterprise-management platforms
Where a locked device is identified, Bioteknik may provide the relevant serial number or device information so the organisation can attempt to remove it remotely.
However, equipment will not normally be returned solely for account or MDM removal once it has entered the processing workflow.
A £10 administration charge per locked device may apply where additional
work is required to:
-
Identify the lock
-
Record the device details
-
Contact the client
-
Assist with remote removal
-
Store the device while awaiting action
-
Recheck and reprocess the equipment
The charge may be deducted from an agreed rebate or invoiced separately where applicable.
Devices that remain locked may have no residual reuse value and may instead require secure data destruction or material recycling.
Final Pre-Collection Checklist
Before releasing equipment, confirm:
-
Equipment has been approved for disposal.
-
The asset register has been updated.
-
Required business data has been backed up.
-
Assigned users and accounts have been removed.
-
MDM and automated enrolment have been cleared.
-
Activation locks have been disabled.
-
BIOS and firmware passwords have been removed where possible.
-
SIM cards and removable media have been removed.
-
Chargers and accessories have been gathered.
-
Locked or damaged devices have been identified.
-
Equipment is stored securely.
-
Collection access and site information have been supplied.

Download the End-of-Life Preparation Guide
For internal use, staff briefings or future disposal projects, download our printable End-of-Life IT Equipment Preparation Guide.
The guide provides a practical checklist covering laptops, desktops, Macs, mobile phones, tablets, account removal, device-management platforms and final asset verification.
Need Help Preparing Your Equipment?
Bioteknik supports organisations with secure IT asset disposal, data destruction, equipment collection, refurbishment and responsible recycling.
Our team can help identify common preparation issues before collection and advise on locked devices, asset lists, secure handling and suitable disposal options.
Related Guides
Continue
exploring practical guidance on preparing, managing and securely disposing of business IT equipment.
Removing Devices from Microsoft Intune and Windows Autopilot
Learn how to remove laptops, desktops and mobile devices from Microsoft Intune, Windows Autopilot and related Microsoft management systems before disposal.
Removing Apple Devices from Apple Business Manager
Understand how to release iPhones, iPads and Macs from Apple Business Manager, Apple School Manager, Find My and Activation Lock before equipment is collected.
Mobile Device Management Before IT Disposal
A broader guide to removing devices from enterprise-management platforms such as Jamf, Samsung Knox, VMware Workspace ONE, Google Admin and other MDM systems.
Secure Data Destruction Methods Explained
Compare software data erasure, degaussing and physical destruction, and learn which method may be appropriate for different types of storage media.
Employee Device Return Checklist
A practical checklist for IT and HR teams managing laptops, mobile phones, tablets and accessories returned by employees, contractors and leavers.
IT Asset Disposal Checklist
Review the main steps involved in authorising, recording, preparing and handing over business IT equipment for secure end-of-life processing.